
Scrappy Gifts here - I'm so happy to be guest blogging at Pinkapotamus! She has such creative ideas. I especially love her recent Snowman Countdown! How cool is that!
Still need a holiday gift idea? How about a Scrappy Clock - perfect way to bring more character to a room: family room, play room, baby's room. Here's the tutorial for you!
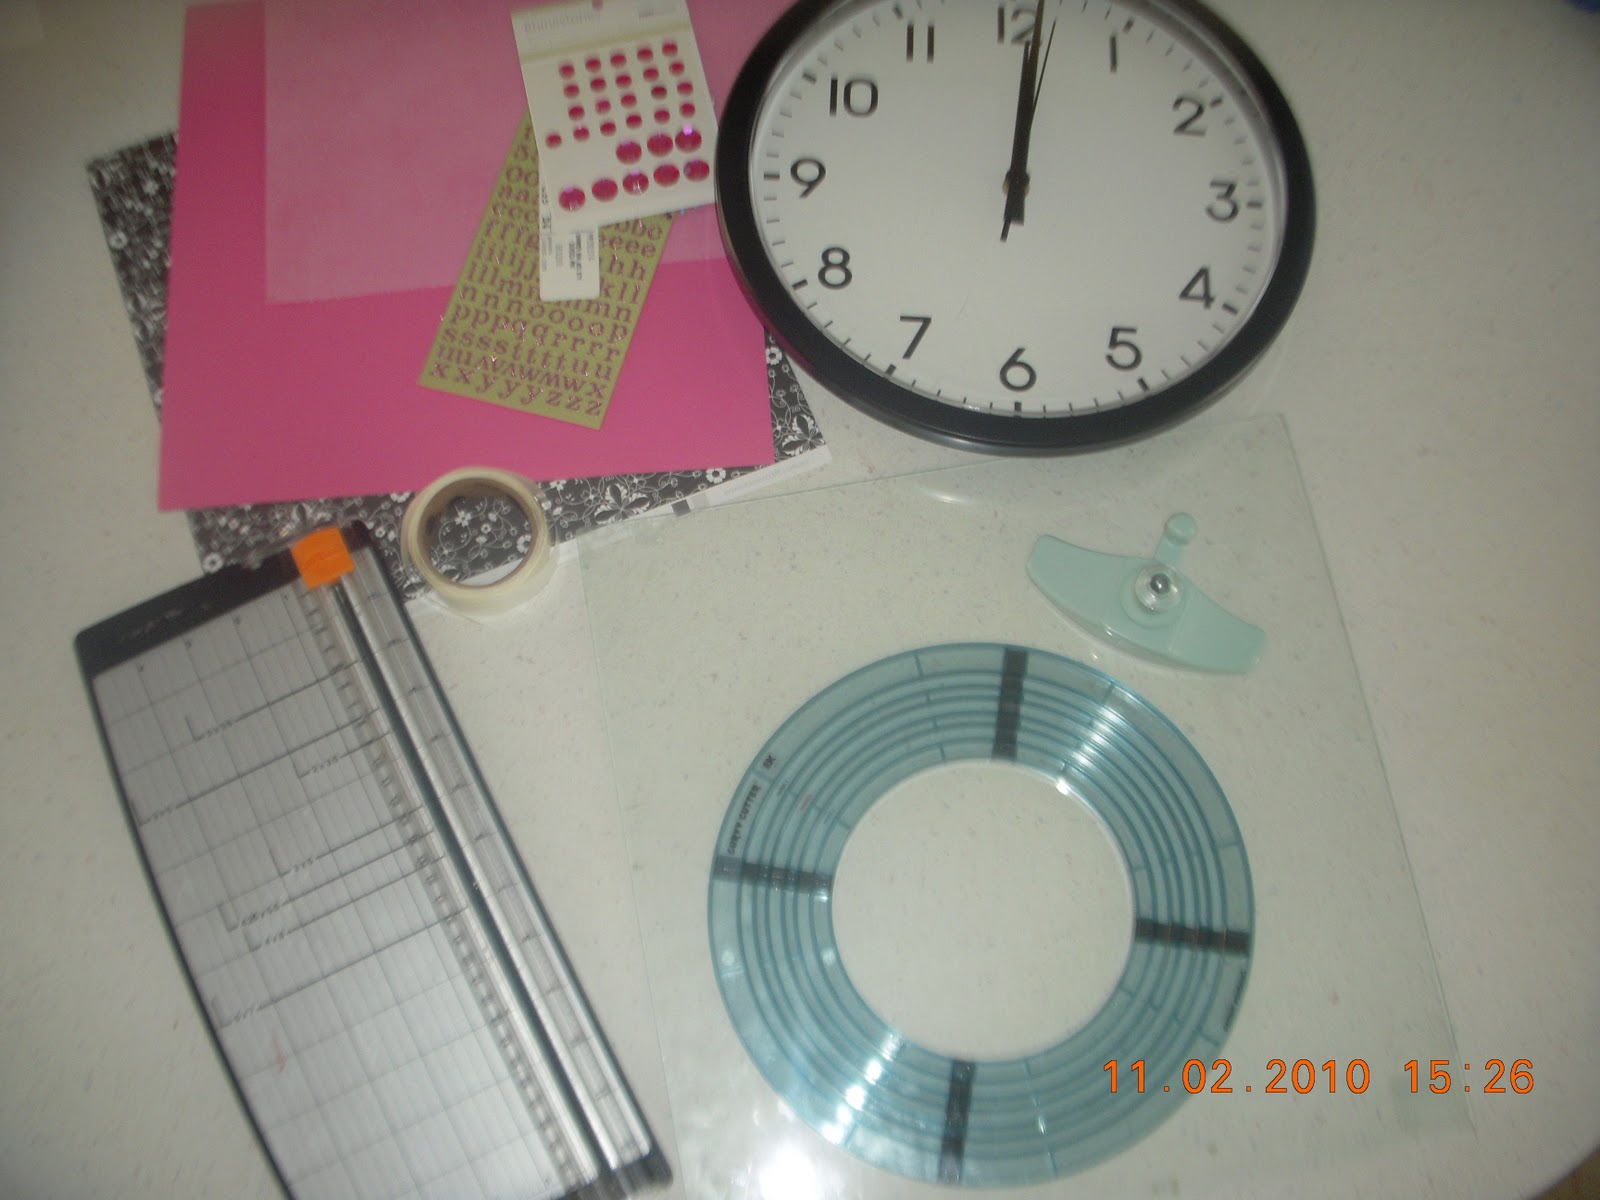
Supplies Needed:
- Clock - mine is a generic one (from Sierra Pacific Crafts) at my local craft store. When I first made a clock, I used Heidi Swapp, but I didn't have the right size to make the circle on my circle cutter so it just became too complicated to trace and cut out the circle myself.
- Circle Cutter - mine is from EK Success
- Piece of glass (to cut your circle on so you don't mess up your table)
- Scrapbooking Paper
- Letter/Number Stickers
- Craft Glue Dots
- Scissors
- Paper Cutter
- Other small embellishments (nothing too bulky or your clock hands won't be able to go around)
- Paper punch (optional) - I typically use a star or flower punch as a background for my numbers


2. Using your paper cutter, cut out a photo matte. I typically make mine 4.5x6.5


4. Remove plastic cover from your clock and the clock hands. Be careful not to bend your clock hands, otherwise you'll have trouble getting your clock hands to work just right again.


6. Then cut the hole to match the center of the clock. Then place clock hands back on, being careful again to not bend them. Then press the center down really well. If they're not in place correctly, the hands will fall our or won't make a correct rotation around your clock.


8. Put plastic cover back on and hang up your clock!

Other Scrappy Clocks I've made: Family One, Business One, and one that can hold 2 pictures.


Come check out my Scrappy Saturdays and link up your scrapbook related projects! Oh and come enter my giveaway for a free Blog Design!

Maryanne Nelson
Scrappy Gifts
http://www.scrappy-gifts.com/
http://craftymommydiva.blogspot.com/

Hello! I am a follower of your blog, and have been for a while! I am reaching out to the blogs I love as well as my readers for a little help and advice. I was nominated a while back for the Top Blog of the Year on Blog Guidebook. I am now in the top ten, and to reach the final round, which is the top TWO, I must beg and plead for votes. If you could in any way help me out, maybe if you could throw a bone to me on your blog, or if you require, I can do a giveaway! I have to find methods to gain voters and your help in some way would be greatly appreciated. Please met me know either way,as well as any ideas you may have. Thank you in advance! My blog is http://danajeanward.blogspot.com and the link to the voting page is www.blogguidebook.com. There is no registration, signup, or email required to vote, which is great, but finding routes to gain supporters is tough! I look forward to hearing from you!
ReplyDeleteDana Ward
Saturday Mornings Blog